SSSICK/BUOY/Usage/SW0 18
Buoy version 0.18 is a deprecated version of Buoy for use with hardware versions R016 through R018 and firmware versions 16xxxx through 18xxxx. It can graph a few parameters including airflow, and can flash firmware of the applicable hardware versions.
Interface
- Main
- Setup port, flash firmware, and view diagnostic information.
- Live Dash
- View and log live airflow data.
- Log Replay
- View previously recorded logs with many ways to manipulate and filter the data.
Usage
Connecting
R019
Starting with R019 hardware the SSSMCK is not bluetooth enabled. While it no longer offers the option for flashing firmware by the user, it can be fully tuned wirelessly without the need to open it or plug it in to a USB cable. If you have an older unit or firmware, we are happy to reflash any unit to the latest firmware at no charge, please email us to get setup!
Bluetooth
Windows 10:
From the Bluetooth main menu, select "Add Bluetooth or other device"

It will ask you to select "Bluetooth device", at which point your computer will scan for the SSSMCK.
Click on "SSSMCK" and it will prompt you for a password. Enter "1234" and click "Connect".

Troubleshooting
Sometimes Windows 10 will not automatically allocate a COM port for Bluetooth devices. You can fix this by following these instructions:
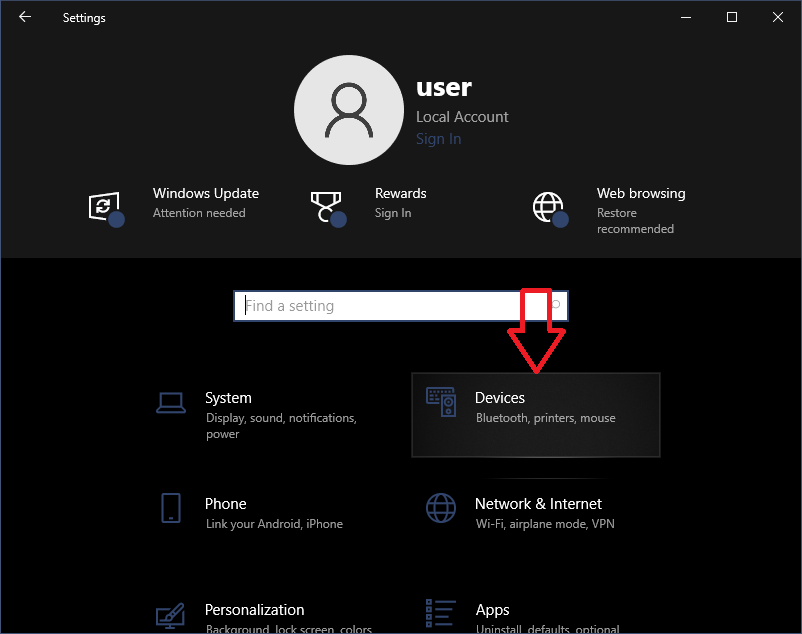
- Open Windows main settings by opening the "Start" menu and clicking on the "Settings" icon or by typing "Settings" and opening the "Settings" app.
- Select "Devices" from the main menu presented.
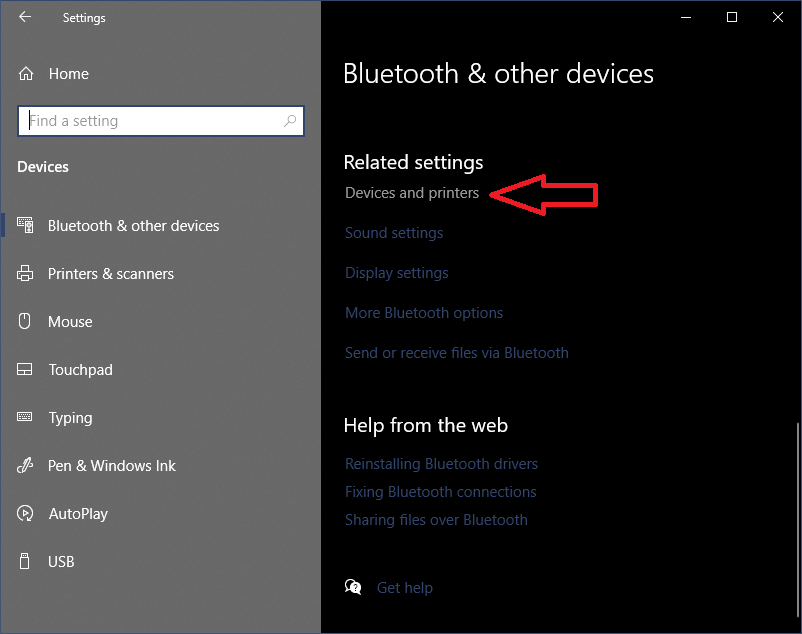
- Under "Related Settings", which you can find either on the right-side or by scrolling down, click on "Devices and printers".
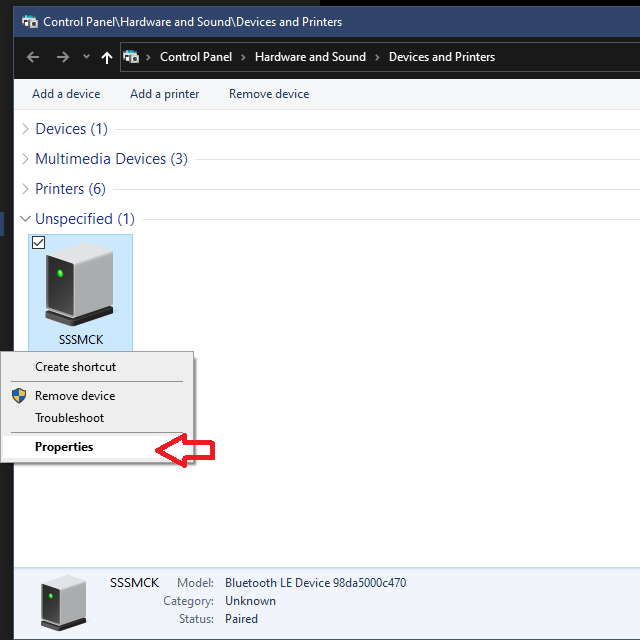
- Find "SSSMCK" under the "Unspecified" section. Right-click it and select "Properties".
- A new window will pop-up. Select the tab titled "Services". Then make sure the box is checked that says "Serial port (SPP)".
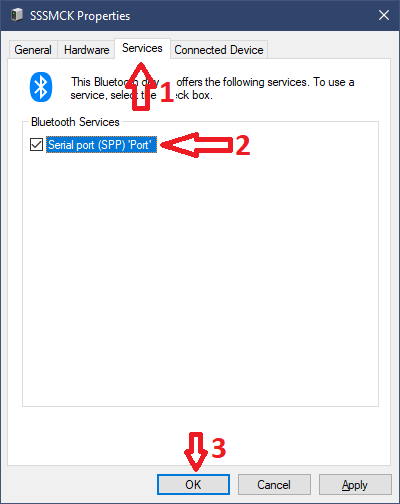
- Select "OK". The SSSMCK will now be able to communicate normally! After you complete this task, you can find the COM port # by returning to the "Services" tab of the "Properties" window. You can see in this screenshot that the SSSMCK is bound to COM port 4 (COM4):


USB
With R019, the connection is now 100% wireless. Please see the bluetooth setup section for more information.
R014-R018
With the top cover removed, you will need to find a 6-pin header. This is where the logging/flashing module will be plugged.

Plug in your logging/flashing module. It can only be inserted in one direction.

Connect the USB cable to your computer. If you are logging, please skip the next step.
ONLY if you are flashing the module!: it is recommended to use the USB power. You can do this by moving the "REG-USB" jumper from the "REG" side to the "USB" side as pictured below:

Once you finish flashing, please make sure to move this jumper back to the "REG" side before continuing use on your vehicle.
Software
On the "Main" tab you will find the connection and flashing options.

First you will need to select the correct port. Click on "Select Port" and you will be presented with a list of available ports.
If you are unsure of which port the SSSMCK is connected through, you can simply disconnect the device and reconnect it to see which port is added and removed. The list automatically updates.

Once the port is selected, click "Connect". It will take 2 seconds to connect, do not repeatedly click the "Connect" button during this time period. The SSSMCK should connect and automatically start sending airflow data. If data is not graphed on the "Live Dash" page, you can try disconnecting and reconnecting.

Data-logging
Once connected the SSSMCK should automatically begin transmitting airflow data to the program. This is displayed in kilograms per hour (Kg/Hr).

On this page you can set an output file. Use the file extension ".csv" for logs (this file extension should automatically be added, but there is a bug in Windows where if your file path has one or more periods it may not be automatically added).
Once you have set the output file, you may begin logging by selecting "Start Recording". Once you are finished recording, select "Stop Recording" or simply close the program.
There are many ways to display the data, as a line (recommended and default), as dots, or as bars. The rest of the options are primarily for further diagnostics when necessary, but should not be needed or used by most users.
Log Replay
If you would like to view previously recorded logs, you can open them a number of ways. They are output as simple CSV files (Comma Separated Values). These can be read by programs such as OpenOffice/LibreOffice Calc, Microsoft Excel, or within Buoy.
To open a previously recorded log, select "Open CSV File" and browse to the folder where the log was recorded. Select and open the log to populate the graph.

You can manipulate the data, apply filters, change how it is displayed, and more by using the "Graph Options" and "Data Manipulation" sections.
Flashing
In hardware version R019xx and newer, flashing is no longer necessary to change various settings. Instead you can program your unit for various sensors and adjust various tuning parameters through Buoy and without the need for a hardware flashing module.
If you are using R018 and older, please follow the below instructions:
On the "Main" page, make sure you have the proper port selected and are connected to the SSSMCK. Under "Firmware Control" click on "Select Firmware" to be presented with a file explorer. Navigate to the firmware (file extension ".mckf") you wish to flash to the device and select it.

Once you have chosen the firmware, the button underneath it will change to "Flash Firmware". Click this button to flash the firmware. A success or failure message will be displayed in the console log.
Configuration
You can configure most of the program's settings, such as the theme and interface scaling, by clicking on the settings icon in the upper-right side of the application.
It's recommended to leave the connection settings alone, they should be configured correctly by default. The interface scaling and themes are easily configurable here.