SSSICK/BUOY/FLASHING: Difference between revisions
| Line 30: | Line 30: | ||
==Connection== | ==Connection== | ||
===Versions up to | ===Versions up to R018=== | ||
With the top cover removed, you will need to find a 6-pin header. This is where the logging/flashing module will be plugged. | With the top cover removed, you will need to find a 6-pin header. This is where the logging/flashing module will be plugged. | ||
| Line 37: | Line 37: | ||
Plug in your logging/flashing module. It can only be inserted in one direction. | Plug in your logging/flashing module. It can only be inserted in one direction. | ||
[[File:Loggingmoduleconnected.jpg|center|thumbnail]] | [[File:Loggingmoduleconnected.jpg|center|thumbnail|Version R017 and R018]] | ||
[[File:R019_flashing_dongle_installed.jpg|center|thumbnail|Version R019]] | |||
Connect the USB cable to your computer. If you are logging, please skip the next step. | Connect the USB cable to your computer. If you are logging, please skip the next step. | ||
| Line 46: | Line 48: | ||
Once you finish flashing, please make sure to move this jumper back to the "REG" side before continuing use on your vehicle. | Once you finish flashing, please make sure to move this jumper back to the "REG" side before continuing use on your vehicle. | ||
===Versions R020 and newer=== | ===Versions R020 and newer=== | ||
Revision as of 13:02, 31 July 2023
Flashing is possible when using a USB flashing dongle, which is included by default with older hardware versions. On newer hardware versions, we can flash the unit for you at no cost, or we can also provide a flashing dongle for a minimal fee -- in either case, please contact us to get setup.
Instructions
Prerequisites
You will need four things in order to flash your unit:
Buoy software
Flashing Dongle
Green or blue-topped black box that plugs into the header or socket of your SSSICK.
Firmware file
A firmware file with the filetype extension "ICKF". Please contact us for the latest version!
Drivers
Windows
You can download the windows flashing drivers here: DRIVER DOWNLOAD Simply extract the executable and run, then plug in your SSSICK.
Linux
You will need to install two additional libraries. This is done quite easily through aptitude, snap, yum, rpm, etc.
The two packages that you need to install are: "libhidapi-libusb0" and "libftdi1"
An example of how to install these would be:
apt install libhidapi-libusb0 libftdi1 -y
Connection
Versions up to R018
With the top cover removed, you will need to find a 6-pin header. This is where the logging/flashing module will be plugged.
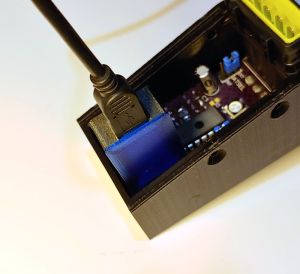
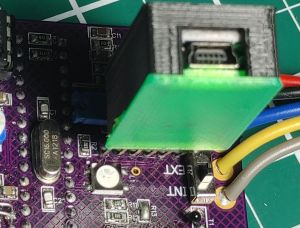
Plug in your logging/flashing module. It can only be inserted in one direction.
Connect the USB cable to your computer. If you are logging, please skip the next step.
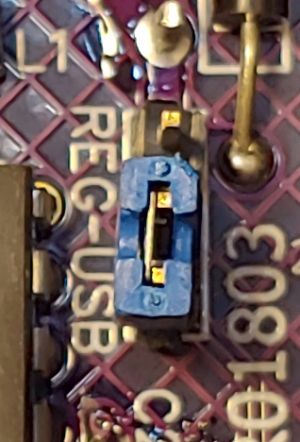
You must then configure the kit to use power supply from the USB dongle. You can do this by moving the "REG-USB" jumper from the "REG" side to the "USB" side as pictured below:
Once you finish flashing, please make sure to move this jumper back to the "REG" side before continuing use on your vehicle.
Versions R020 and newer
While we prefer to reflash these ourselves at this point, we can provide a flashing dongle. You no longer need to flash the unit to change tuning options, so we no longer include a dongle with the kit. All tuning can be done over bluetooth.
Flashing
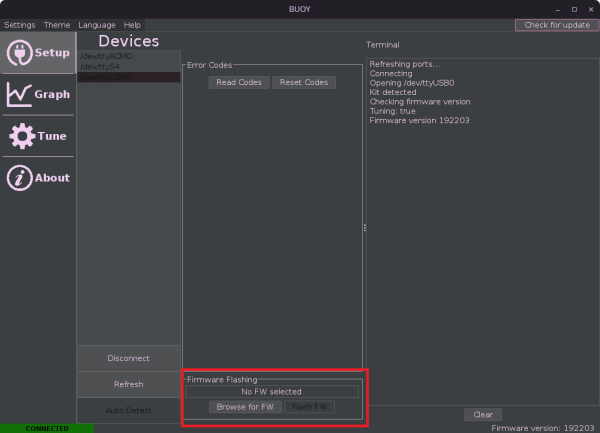
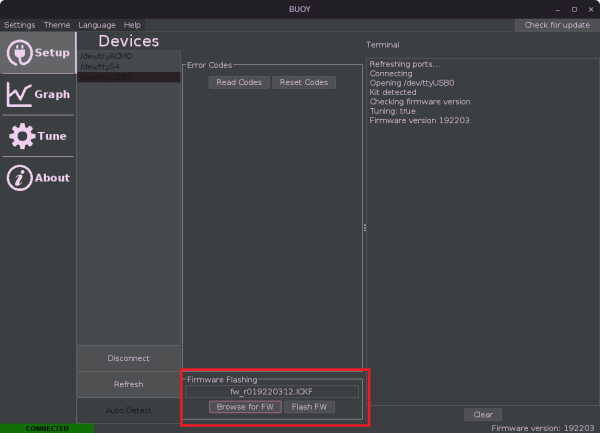
When you connect with the USB dongle, Buoy will show a new box that allows firmware selection and flashing (see red outlined box):
Click "Browse for FW" and select the appropriate "ICKF" file. You will then be allowed to select "Flash FW"
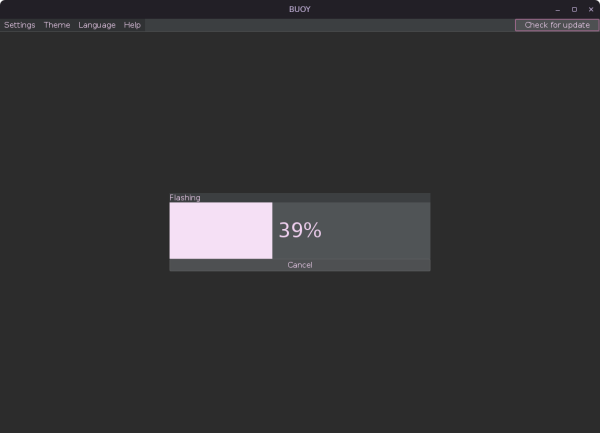
After clicking "Flash FW" a progress box will appear:
After you finish flashing, a warning dialogue will appear giving you final instructions on how to update the stored settings to match your latest firmware's requirements:

